
"This is a plugin-package that will allow the RPG Maker MV users to create a more immersive experience for their own game. In which include several tools to make more easy to do it!"
|
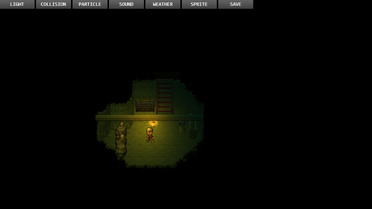
For this project I have adapted the <pixi-light> to let you create a great ambience for your game. You can as well, add on the map, sprite picture as light (it's more light (perfomace) on overall).
It is important to know that for this work well, all sprite that will receive the light, need to have a texture with normalmap (you can see some example below). |
[x] : Light Editor | Able you to display/edit the light sources more easy
[x] : Use the Mouse to change the position
[x] : Change the opacity/brightness of the light
[x] : Change the color of the light
[x] : <pixi-light> change the light-height
[x] : <pixi-light> change the falloff
[x] : <pixi-light> Create a Point source of light
[x] : <pixi-light> Create a Ambient source of light
[x] : <pixi-light> Create a Directional Point source of light
[x] : <sprite-light> change his scale
[x] : <sprite-light> change his rotation
[x] : <sprite-light> change his anchor
[x] : <sprite-light> change his blend mode
[x] : <sprite-light> Pick up a picture from the library of lights
[] : <sprite-light> The possibility to create a animated sprite-picture source, by using the frame logic.
[x] : Pulsing effect
[x] : Oscilation effect
[x] : Change in which period of the time the light will be showed
[x] : Setup a switch to active/deactive the light source
[x] : Change in which floor the light source is on
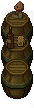
[Normal Map, example]: Every normalmap texture need to be the same name as the normal texture (diffuse) with prefix '!'
SM_uVendedor.png | !SM_uVendedor.png
SM_uVendedor.png | !SM_uVendedor.png
|

|
|
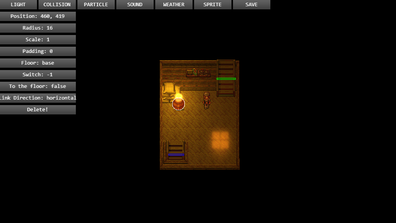
For this project I have adapted the <sinova/collision> system to create the Collision system. As well, I've build a pixel-movement that follows up the grid of 8x8.
For the animation movement and collision body for the sprites, all the setup will be done on .json files (you can see it below). There will be a editor to make it more easy. |
[x] Collision Editor
[x] Create a circle body
[x] Create a rectangle body
[x] Create a polygon body (add how many points you want to)
[x] Use the Mouse and the Arrow directions to change the position
[x] <circle> change the radius
[x] <circle> change the overall scale
[x] <rect> change the overall scale
[x] <polygon> add points
[x] Change where the collision body is on (floor)
[x] Setup a switch to active/deactive the collision body
[x] Setup if the collision body itself will be a link to another floor
This is the default 'json' file for all sprite. In this file you can setup the frame-animation and the general collision body for all sprites. Of course, you can do create personal setup for any sprite. And for this, there will be a editor (w.i.p)
[] Animation & Collision Sprite Editor
[x] Movement System
[x] Animation State, you can setup different kind of states for the movement. Example: a animation-state where the sprite is moving or when the sprite is jumping or running, etc.
[x] Movement System
[x] Animation State, you can setup different kind of states for the movement. Example: a animation-state where the sprite is moving or when the sprite is jumping or running, etc.
|
|
For this project there will be a Time System in which allow you to create a lot of stuff, look at the feature list.
|
[x] Allow you to display different particles at different period of the time. Example is the fire-torch particle.
[x] Allow you to create different light sources for every period of the time. So you can create a nice atmosphere for you game. Like a ambience for a Pub.
[x] Allow you to create different sound sources for every period of the time. So at night, there will be some frog songs for example. At the day, there will be some bird songs.
[] Allow you to show up some sprite of the map on different period of the time. Example: at the day, the neon panel of a shop is off, at night, he will change up to a different sprite.
[] Allow you to create/edit the behaviors of each npc by different period of the time.
|
|
For this project I've adapted the <pixi-particles>, so you can use the online editor available and put him on your game. There will be a editor to configure your setup as well.
|
~ under Work in Progress ~
|
|
In the in-game editor menu, there will be a option to edit the Sprites of the map.
|
[] : Change the opacity when the sprite is above the player.
[x] : Change the overall opacity
[x] : Change the blend mode
[x] : Change in which floor the sprite will be at
[] : Setup a switch to active/deactive the visibility of the sprite.
[] : Setup a time-period in which the sprite will be showed up.
[] : <sprite-frame> change the speed of the animation rate
[] : <sprite-frame> setup a switch to active/deactive the animation

|
For this project I've adapted the <goldfire/howler> system. Then, you will be able to create spatial sounds and some effects. There is a editor to edit the setup of each songs
|
|
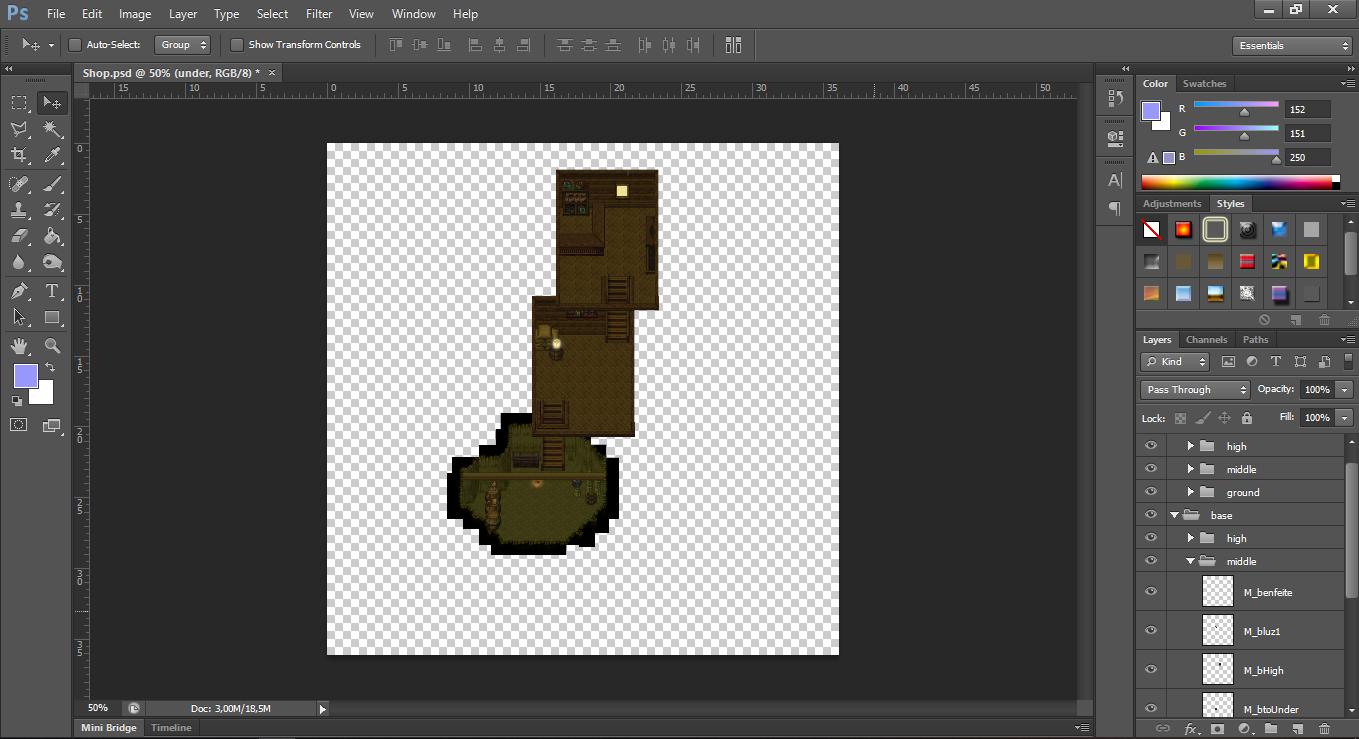
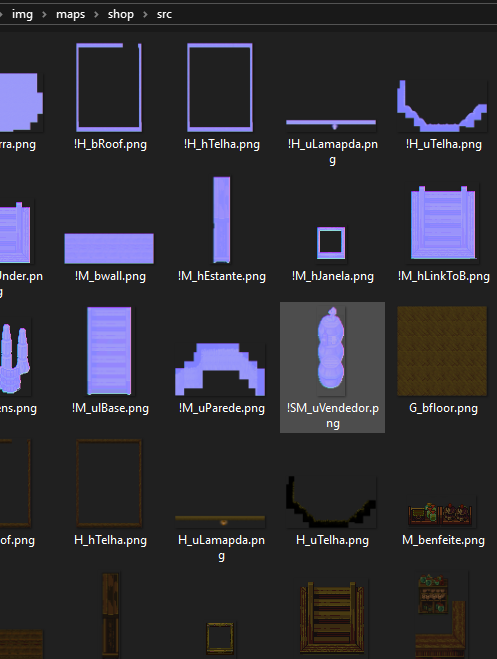
In this project there will be no use on the default editor of the RPG Maker MV to create the maps (only for events/npc). With this plugin, you can create the map on Photoshop (I would recommend this one), or Gimp or whatever other program, since you follow up the rules of the system (look below as well the pictures)...
Why I would recommend the Photoshop? Because I've created a simple script-extension that allows you export the information of each layer in a way that is already configured for this Plugin-System. And for the normalmap textures, you can use this extension-tool provied by NVDIA. To export all pictures-layers, you can use this script-extension here. |
[All the 'how to setup' will be available in a more detailed pdf file when this plugin is released]
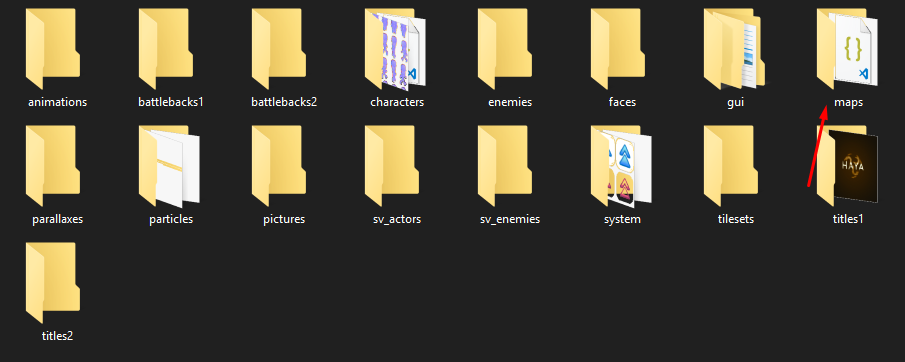
Rules #1 : You need to create a folder named 'maps' on the folder 'img' of your project
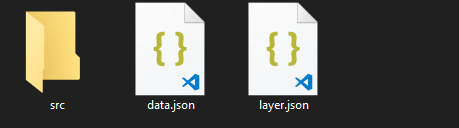
Rules #2 : There is a need of a folder named 'default' on 'maps'. With some default files and folders (folder: src, file: layer.json, file: data.json). And need to have a file named 'setup.json' on the folder 'maps'.
Rules #3 : For each picture there is a need of a texture in normalmap. And the picture that has the normal map texture, need to be have the same as the normal (diffuse) picture with the prefix '!'.
Rules #4 : For each filename of the pictures, there will be some prefix in which has to be. To define the priority of the sprite over the map (z-Index).
Rules #5 : There is a need of a file named 'layer.json'. On this file, you need to have some settings (see on the picture).
Rules #6 : There is a need to have a file named 'data.json', on this file you just need to configure three variables (name, width and height), the rest you can configure on the editor.
Rules #1 : You need to create a folder named 'maps' on the folder 'img' of your project
Rules #2 : There is a need of a folder named 'default' on 'maps'. With some default files and folders (folder: src, file: layer.json, file: data.json). And need to have a file named 'setup.json' on the folder 'maps'.
Rules #3 : For each picture there is a need of a texture in normalmap. And the picture that has the normal map texture, need to be have the same as the normal (diffuse) picture with the prefix '!'.
Rules #4 : For each filename of the pictures, there will be some prefix in which has to be. To define the priority of the sprite over the map (z-Index).
Rules #5 : There is a need of a file named 'layer.json'. On this file, you need to have some settings (see on the picture).
Rules #6 : There is a need to have a file named 'data.json', on this file you just need to configure three variables (name, width and height), the rest you can configure on the editor.

Here goes the lastest video showing the plugin itself in use
|
|
|
[Resources used]
<pixi-lights>
<sinova/collision>
<limikael/PixiTextInput>
<goldfire/howler>
<davidfig/PixiViewport>
<pixi-lights>
<sinova/collision>
<limikael/PixiTextInput>
<goldfire/howler>
<davidfig/PixiViewport>
